2021-07-14
Before we perform an UAV aerial survey, we need to carry out component installation and pre-flight inspection. These tasks look very simple, but in fact they are extremely important. Details make a difference. A perfect inspection leads a successful flight mission.
1. Recharging Battery
Connect charger with a power source, then connect battery with charger via cable. Set the charging current to 15A, or 25A for quick charge.

Press and Hold Start/ Stop key, the indicator light turns on and be red, charging starts.
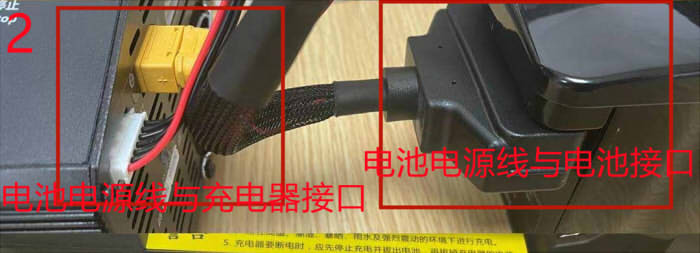
When the battery has been fully recharged, the light turns to green, now press Start/Stop key again to stop recharging, and you can remove battery from charger.

2. Camera Inspection
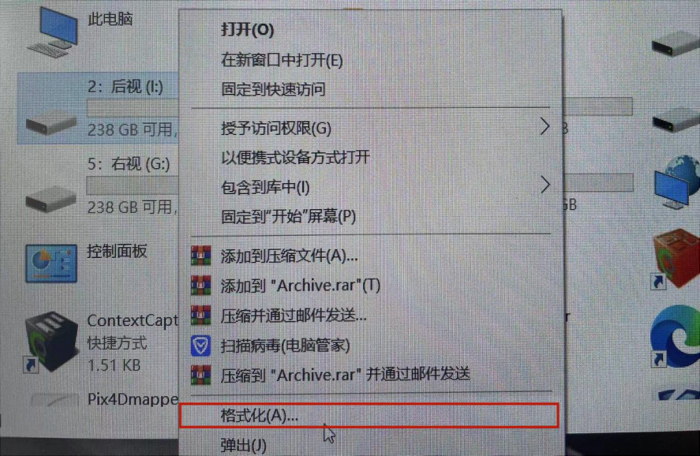
1) Before performing a flight mission, you need to connect T53P camera with a PC via USB Type-C cable. Then format the memory storage discs of the camera. It will improve the reading speed when you pre-process photos after flight.
2) Before installing camera onto UAV, you need to clean the camera lens with lens cleaning tissue or cloth.
3) Installing camera onto UAV before you install battery.
3. Installing Camera and Battery
1) Installing Camera
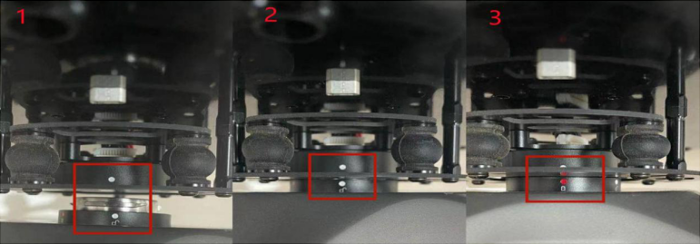
Align the white point of the T53P five-lens camera with the white point of the installation port of the drone, then rotate it to the right until the red point of the lens is aligned with the white point of the port. When a "click" sound is heard, it indicats that the five-lens camera is successfully connected to the drone.
2) Installing Battery
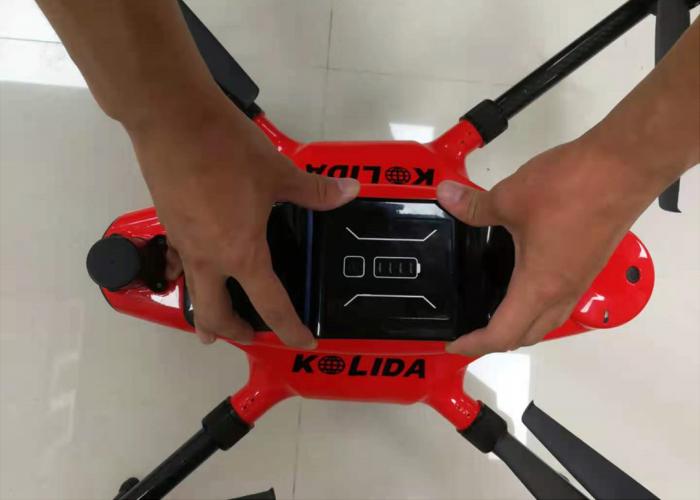
Pinch the both sides of the battery, align the side with the battery joint to the UAV battery compartment, press down until the battery are locked tightly.
4. Taking Photos
1) After the battery is installed, the T53P five-lens camera turns on automatically. When you hear the "Click" sound from the camera shutter and a beep from buzzer, it means that the self-test has passed.
2) Connect the drone with the remote controller, press "A" button on controller. Camera will take a photo and you will hear the sound from shutter. Press "A" button again to quit.
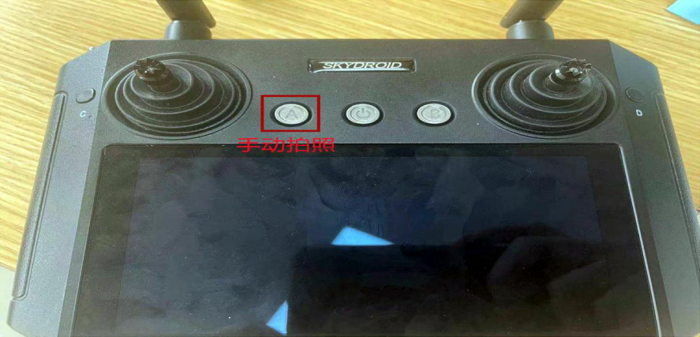
Repeat this process three times to take three photos, When you take photos you need to observe whether the indicator light flashes once a photo is taken. The light is the last one of the four lights.
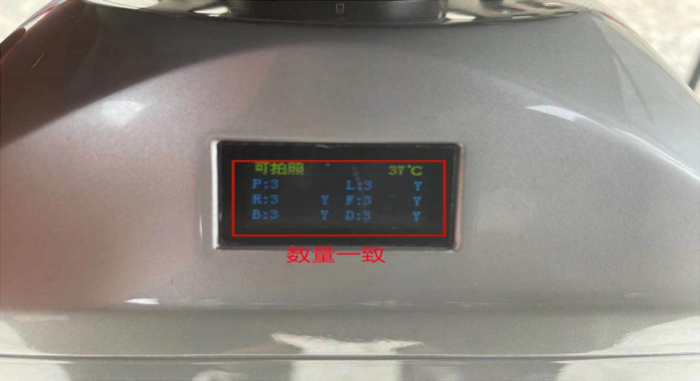
Now look at the camera screen, the number of photos of the five lenses should be both 3. It means that there is no missing photo with any camera.
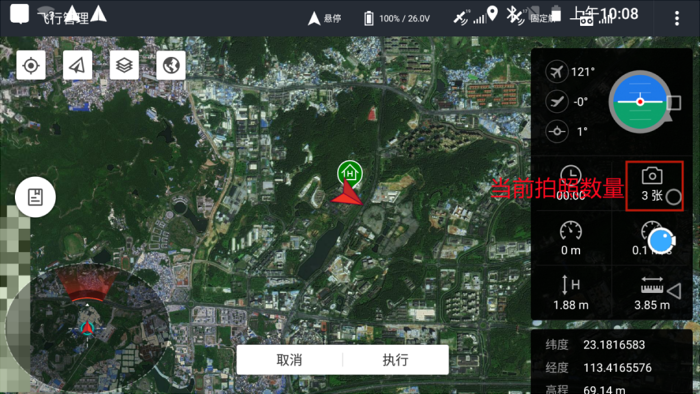
Controller screen also shows photo number is 3.
5. Drone Inspection
1) Check Components
Check whether the network antenna is installed, whether any components are damaged.
2) Drone Self-check
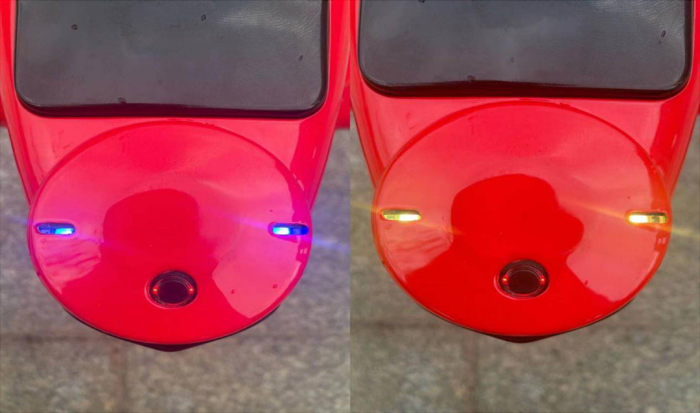
After intalling the battery, when the GPS indicator light turns from blue to yellow, the self-check is completed.
3) Check GPS Signal
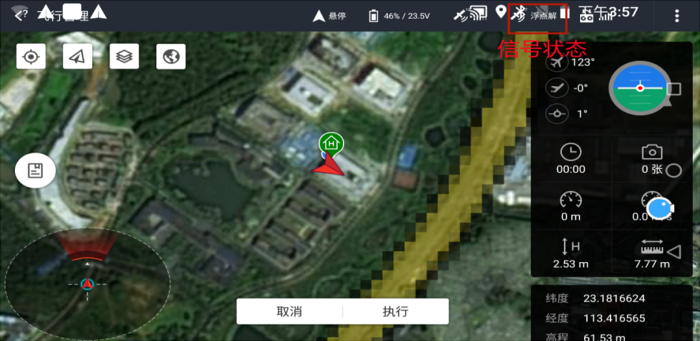
After connecting the drone with the remote controller, we can check the GPS solution status. It may shows single, float, fixed or invalid. If you see "invalid", you need to input a new registration code.
4) Check Indicator Light
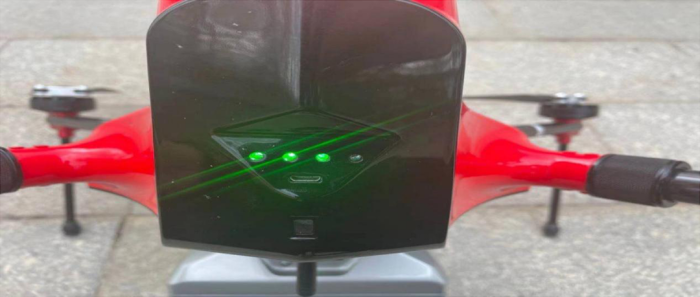
There are four indicator lights on the drone. From left to right, they are the power light (be lighted when battery is installed), GPS light (flashes when it is detecting GPS signal), POS light (flashes when it is recording data ), camera indicator light (flashes once you take a photo).
5) Check Remote Controller
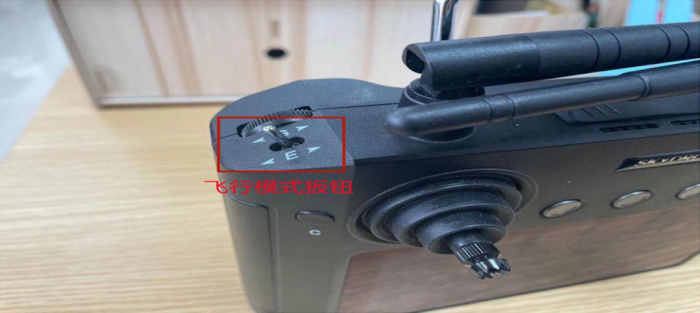
The controller should be set in Hover Mode. The button is on the left shoulder.
Center-up means maintaining the height in . Center means hover.
6) Check the brushless motors
This operation is mainly for the drone that has been unused for a long time.
a) Press and hold the button on the GPS antenna until it turns green. The pilot needs to keep a safe distance from the drone.
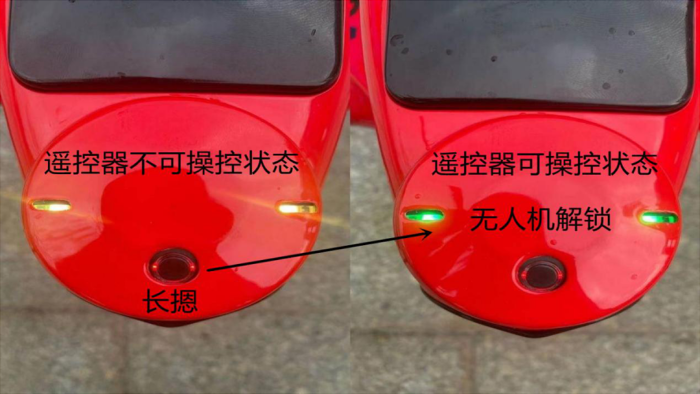
Then push the remote controller joysticks downward as "↘ ↙" until the GPS indicator light turns from yellow to green. The remote controller shows "unlock", then you can release the joysticks. Now motors start to rotate, you can observe whether the four motors are in good condition.
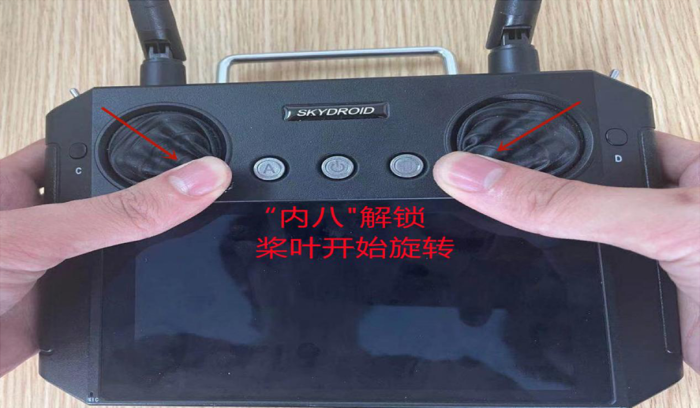
b) After the check is done, pull the joysticks downward as "↓↓" until the motors stops rotating, remote controller shows "locked". Now you can approach the drone, press and hold the GPS antenna button until the green light turns to yellow. You can hear the beeps from drone, it means the system is locked, uninstall the battery now.
6. Check Settings on Remote Controller
1) Enter Ground Station Flight Management menu, select Settings Button on the upper right corner of the screen.
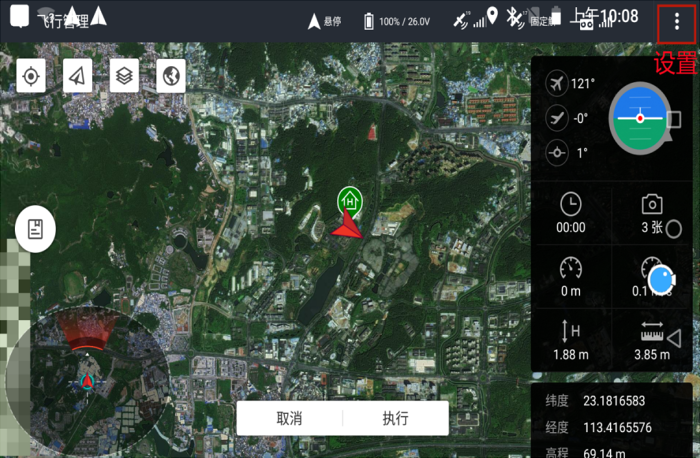
2) Flight control parameter: Check whether the return altitude is consistent with the flight altitude.
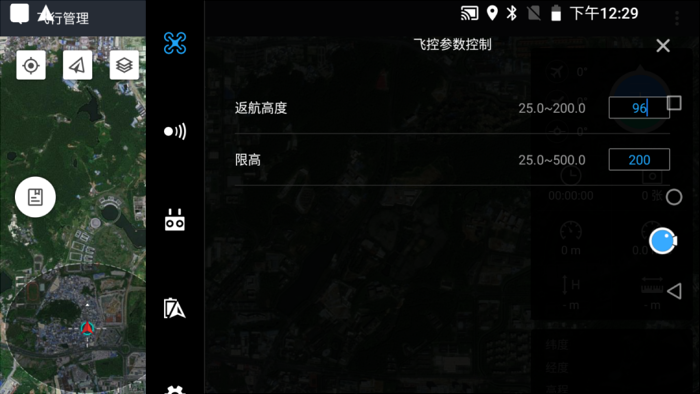
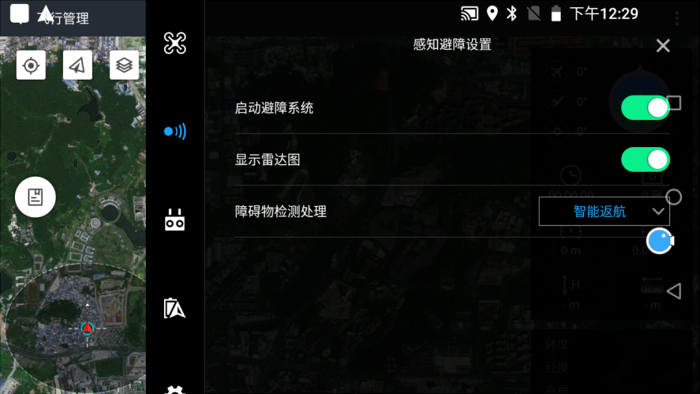
3) Perceive obstacle avoidance: turn on all functions, and select intelligent return for obstacle detection processing (the aircraft will return to the take-off point when the obstacle is predicted).
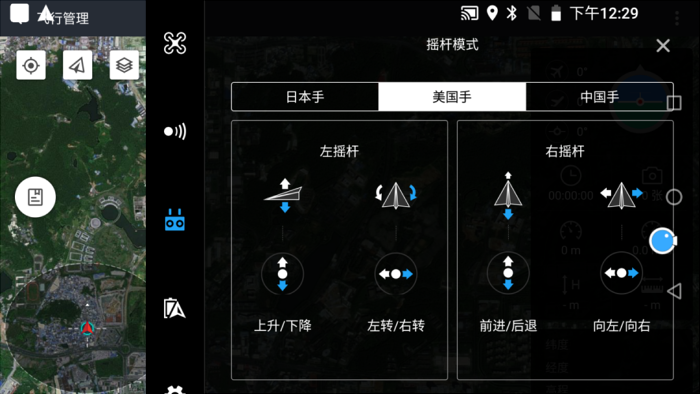
4) Joystick mode: Choose the mode you like.
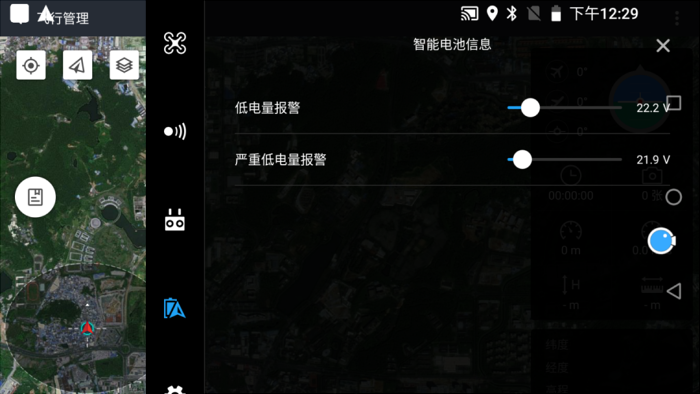
5) Voltage alarm setting: Low voltage alarm is generally set to 22.0V~22.2V, and severe low voltage alarm is generally set to 21.9V.
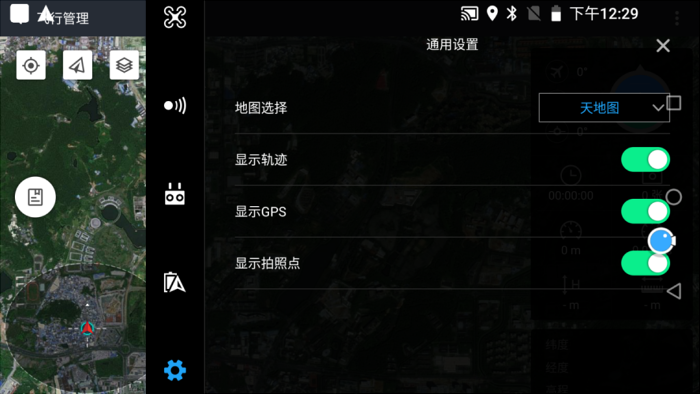
6) General settings: Choose the online map as you like, and choose ON for track display, GPS display, photo point display.
That is all, now we can go to fly!
